Reviving the East Bed — From Nearly Dead to Blooming Beautiful
Some garden projects start with a grand vision and a Pinterest board. This one started with me standing in my backyard on a gorgeous May morning, staring at a scraggly bed of rhododendrons that had seen better days, thinking — I can do something with this.
And then I did. All of it. Today.
Meet the East Bed
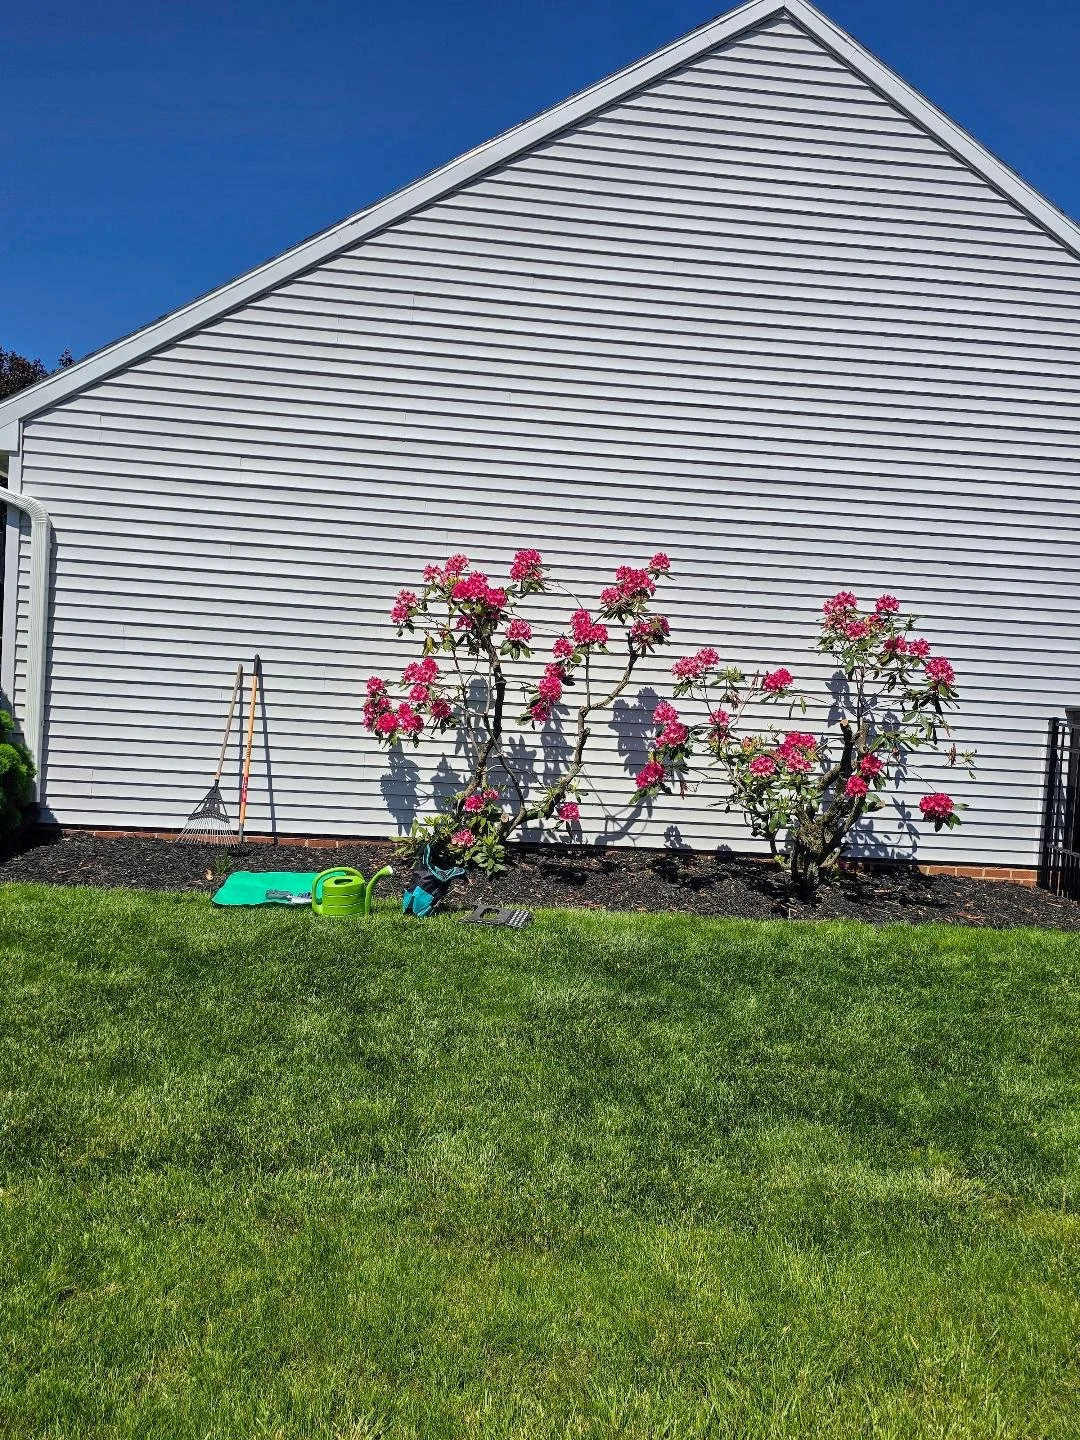
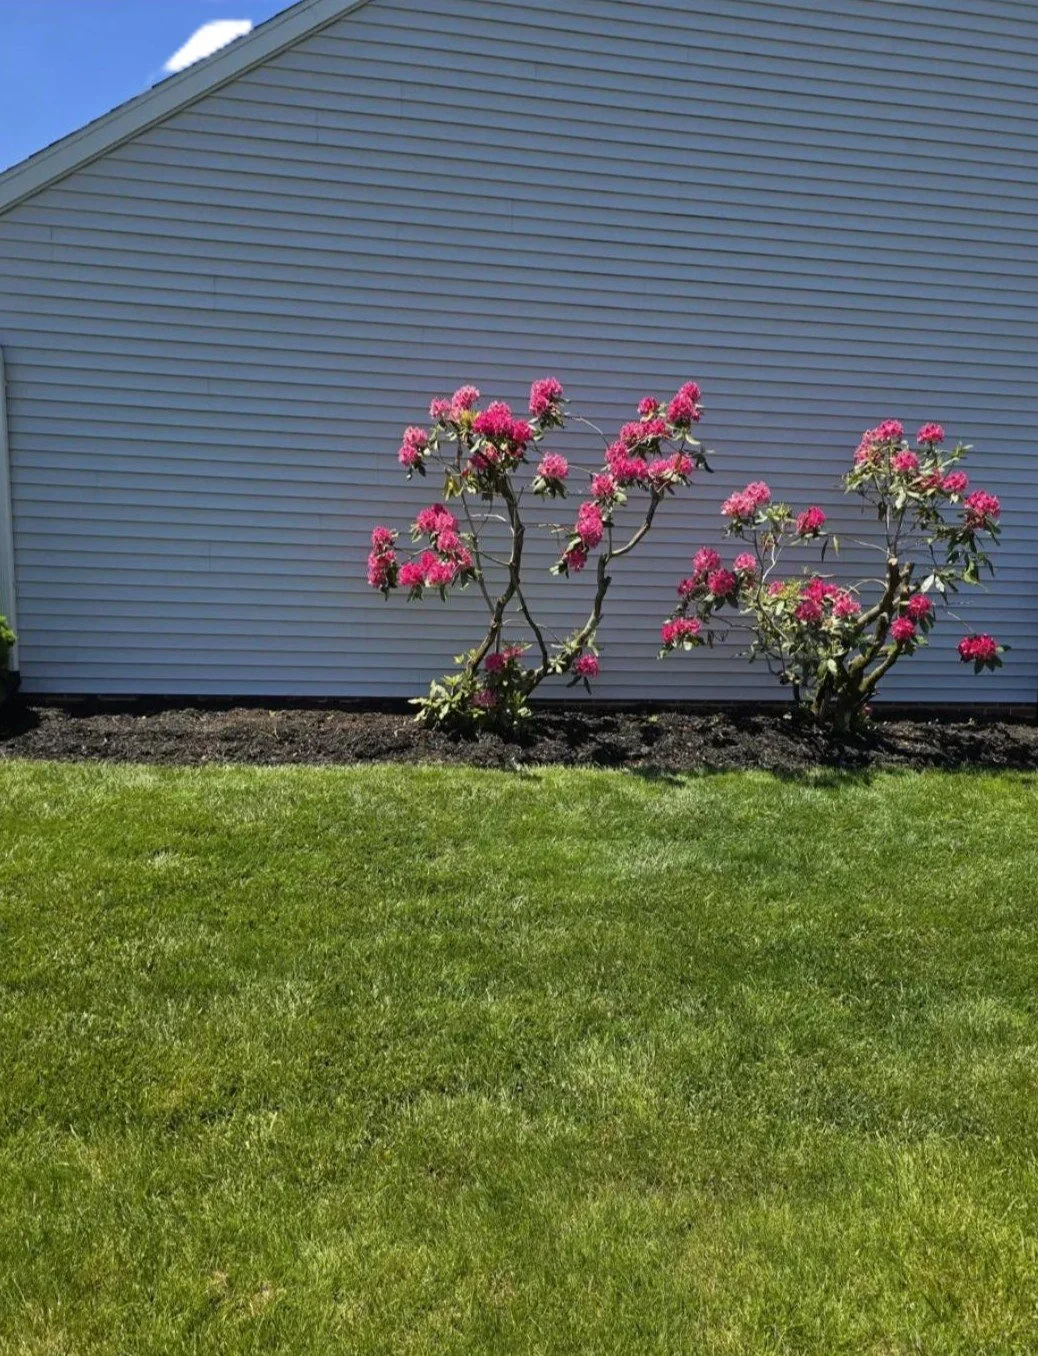
Along the east side of my house — a long bed hugging the foundation wall with no windows, just wall space and two rhododendrons that have been through it. Leggy. Sparse. Looking a little sorry for themselves after a rough few years.
But here's the thing about rhododendrons — they're fighters. Mine were coming back at the roots, putting out new growth, and this spring? They showed up absolutely loaded with the most gorgeous deep pink blooms. Honestly? They stopped me in my tracks.
They didn't need replacing. They needed a little love, some good fertilizer, and some beautiful companions to grow alongside them.
So that's exactly what I gave them.
The Plan — Layers, Layers, Layers
Good garden design is all about layers, and this bed gave me the perfect canvas for a classic layered look:
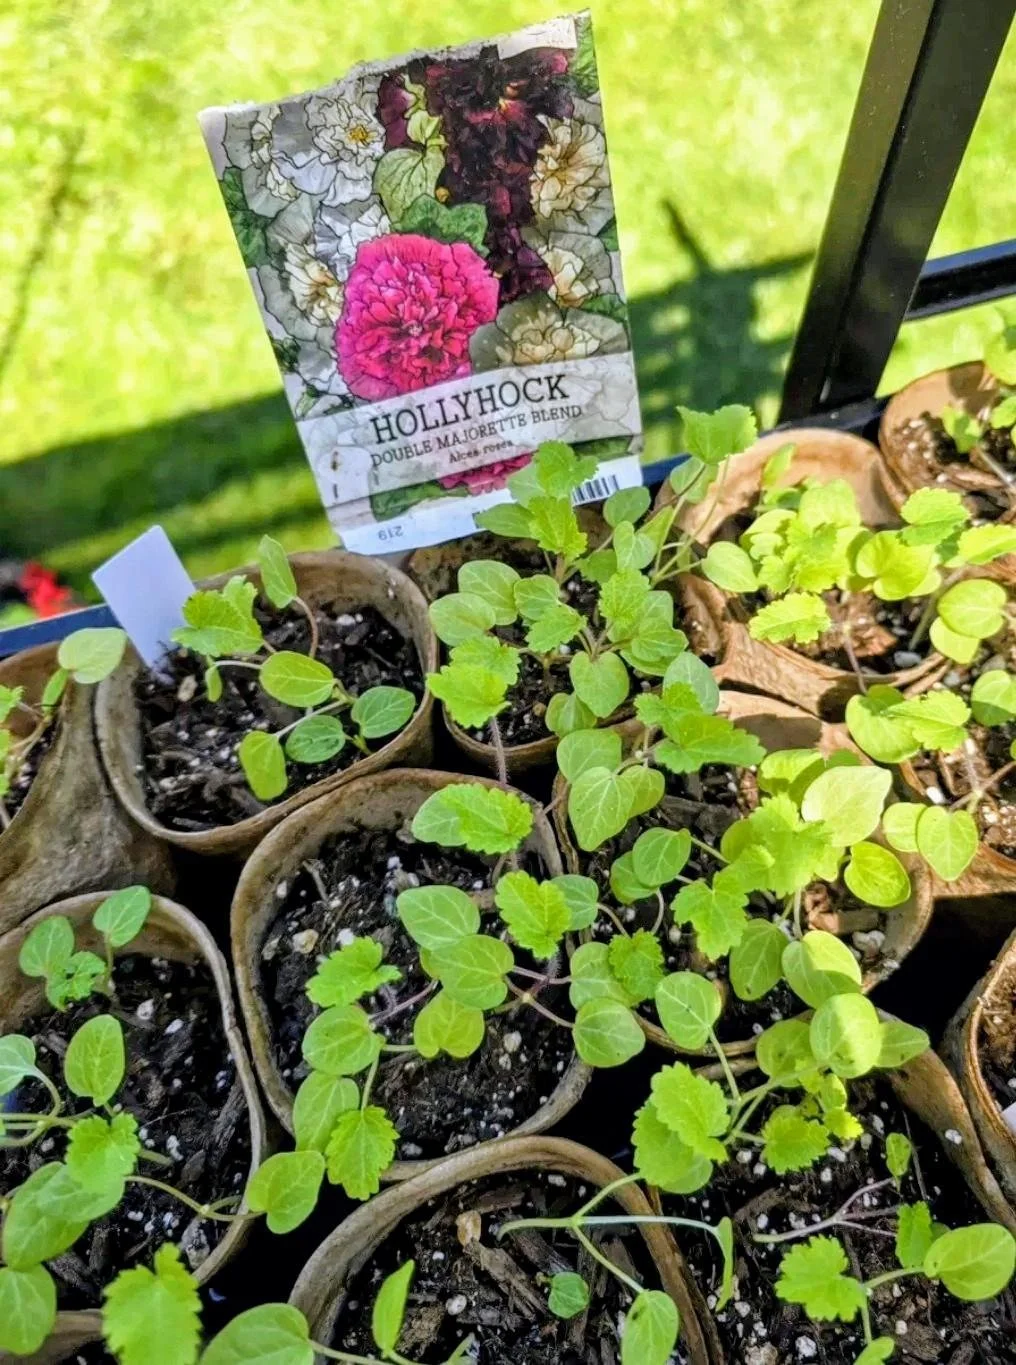
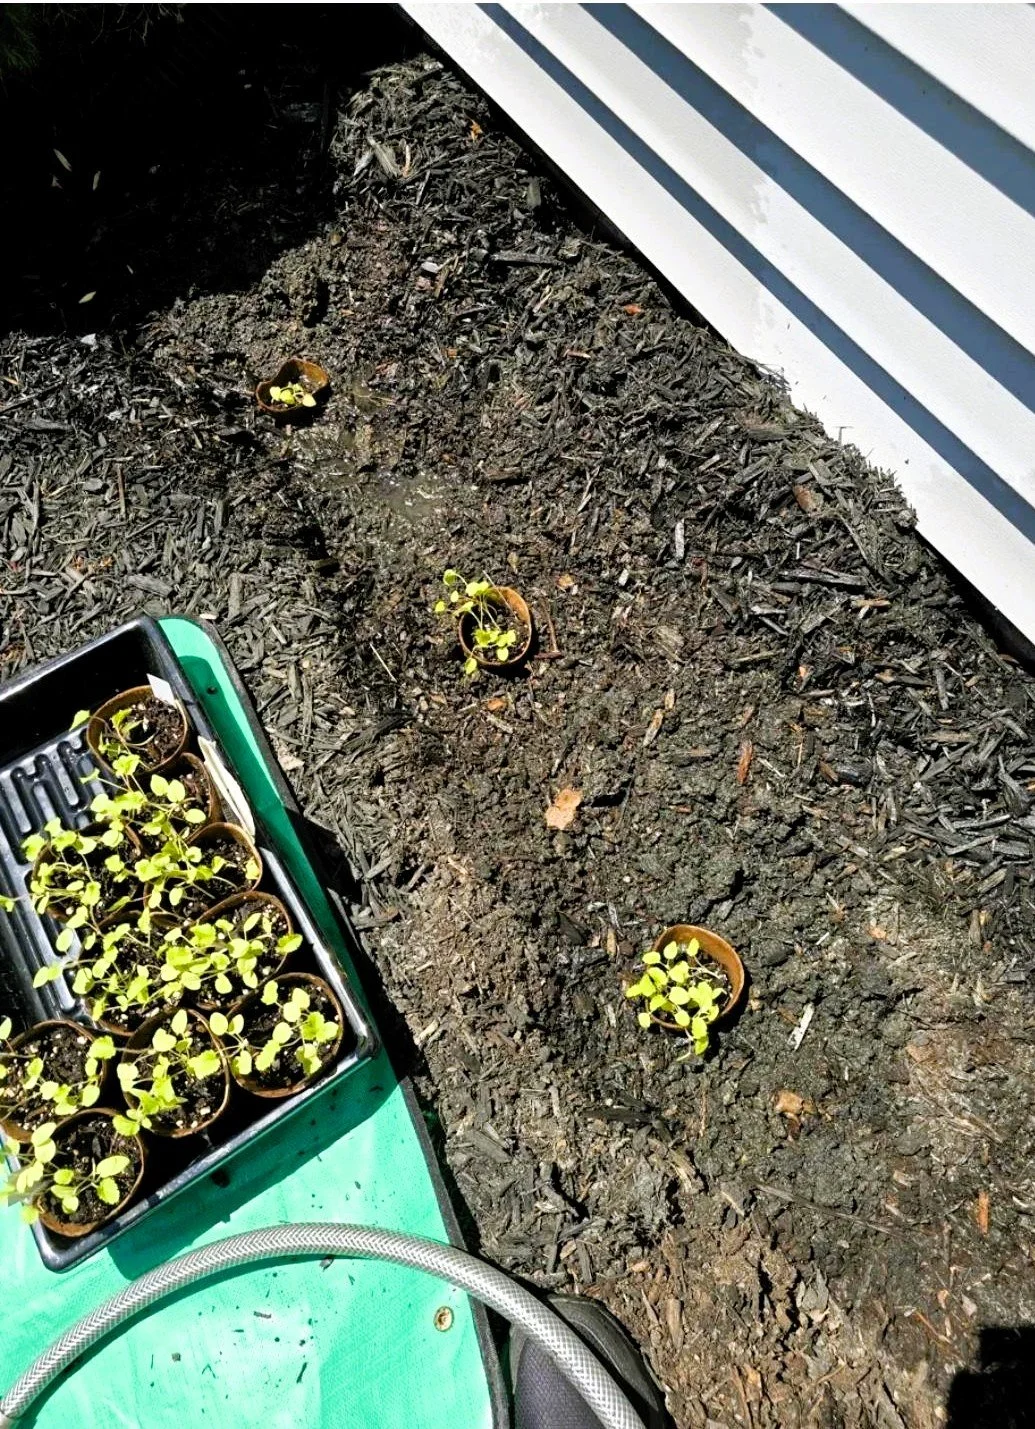
Back row — Hollyhocks right up against the house, about 18 inches from the foundation. These tall dramatic beauties will eventually reach 5-6 feet, creating a gorgeous vertical backdrop. I grew these myself from seed — Double Majorette Blend hollyhocks — and they've been living under grow lights in my basement nursery for weeks waiting for their moment. Today was their day.
Middle — the Rhododendrons stay right where they are. Fed, watered, appreciated.

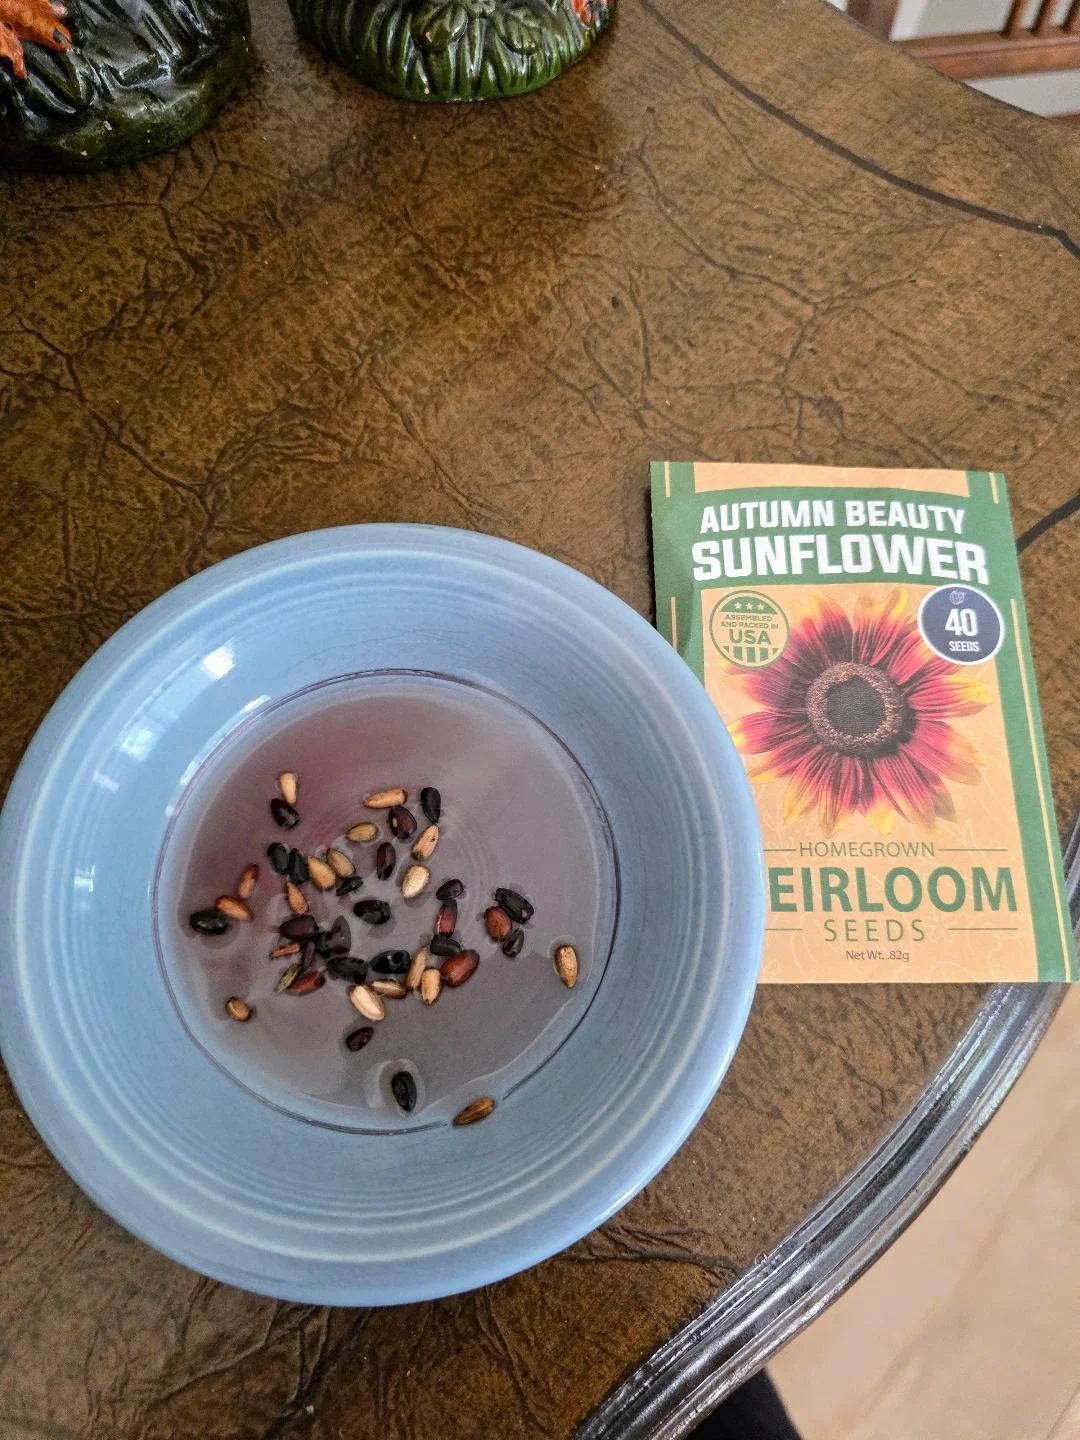
Front row — Autumn Beauty Sunflowers sown from seed about 30 inches out from the house, staggered between the hollyhocks so every plant gets light and nothing blocks anything else.
The staggered layout was key. Instead of two straight boring rows, each sunflower sits in the gap between two hollyhocks when you look straight at the bed. From above it looks like this:
HOUSE WALL
🌸 Holly · · · 🌸 Holly · · · 🌸 Holly
· · · 🌻 Sun · · · 🌻 Sun · · · 🌻 Sun
LAWN
Intentional. Designed. And honestly not complicated once you see it.
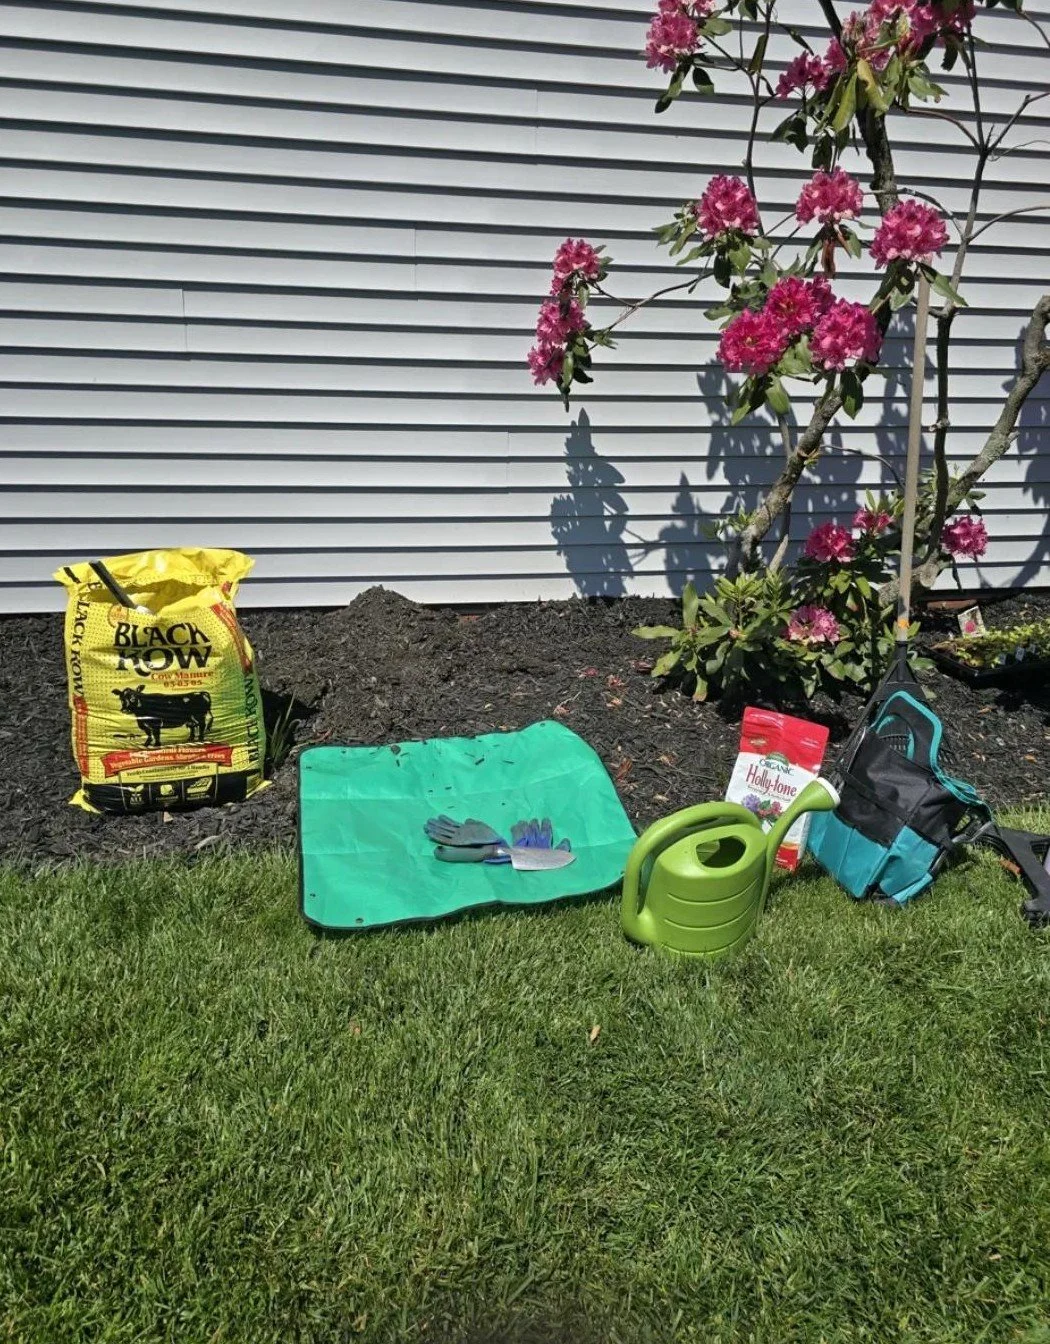
What I Used
I kept the product list simple:
Black Kow Cow Manure — worked into every planting hole for the hollyhocks and mixed into the sunflower seed area. Gentle, organic, won't burn young plants.
Espoma Holly-tone — sprinkled around the drip line of the rhododendrons. Rhodies love acidic soil and Holly-tone is made exactly for them. If yours are struggling, this is your first move.
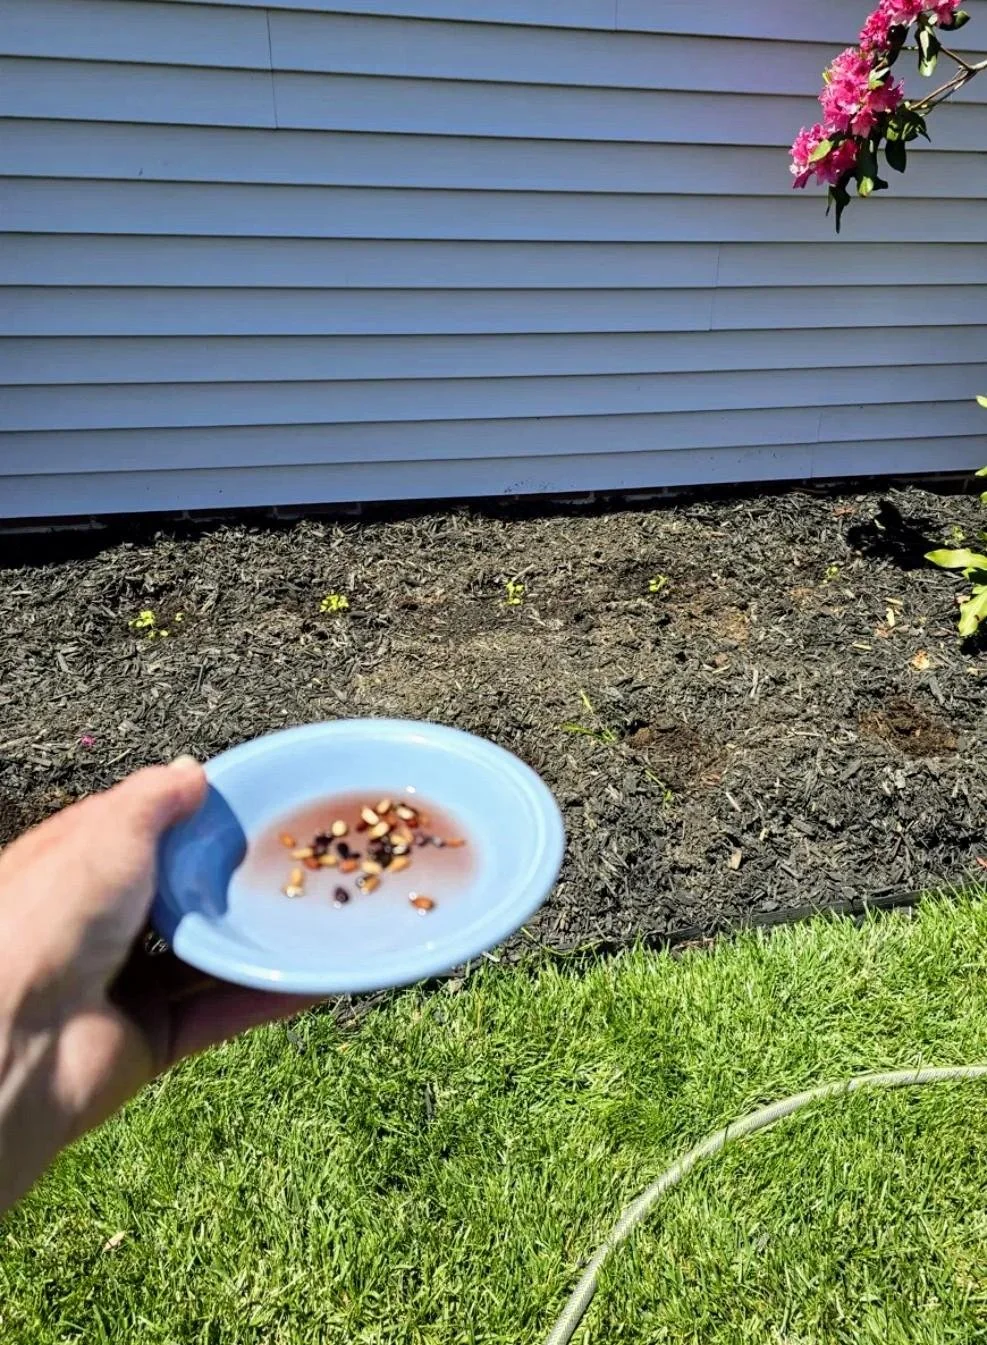
Soaked sunflower seeds — I soaked the Autumn Beauty seeds overnight (about 14 hours) before planting. Soaking speeds up germination and gives the seeds a head start. With soaked seeds in May I should see sprouts in 5-7 days!
Peat pots for the hollyhock seedlings — the secret is tearing the bottom out before planting so roots can escape, and making sure the rim sits at or below soil level so it doesn't wick moisture away from young roots.
The Planting Day
I'm not going to pretend it was glamorous. It was a full morning of digging, kneeling, watering, and hauling — on a beautiful sunny May day that got warmer by the hour.
I raked the bed out, worked in the Black Kow, got every hollyhock seedling settled into its spot along the house wall with a generous circle of clear soil around each one (mulch is your friend from a distance, your enemy up close against young stems). Then I sowed the sunflower seeds in that staggered front row — scratch a shallow trench, drop 2-3 seeds every 12-18 inches, cover lightly, water gently.
I also gave the rhododendrons a good drink and their Holly-tone treatment while I was at it. They've earned it.
The whole thing took most of the morning. There may have been a ham sandwich involved at some point.
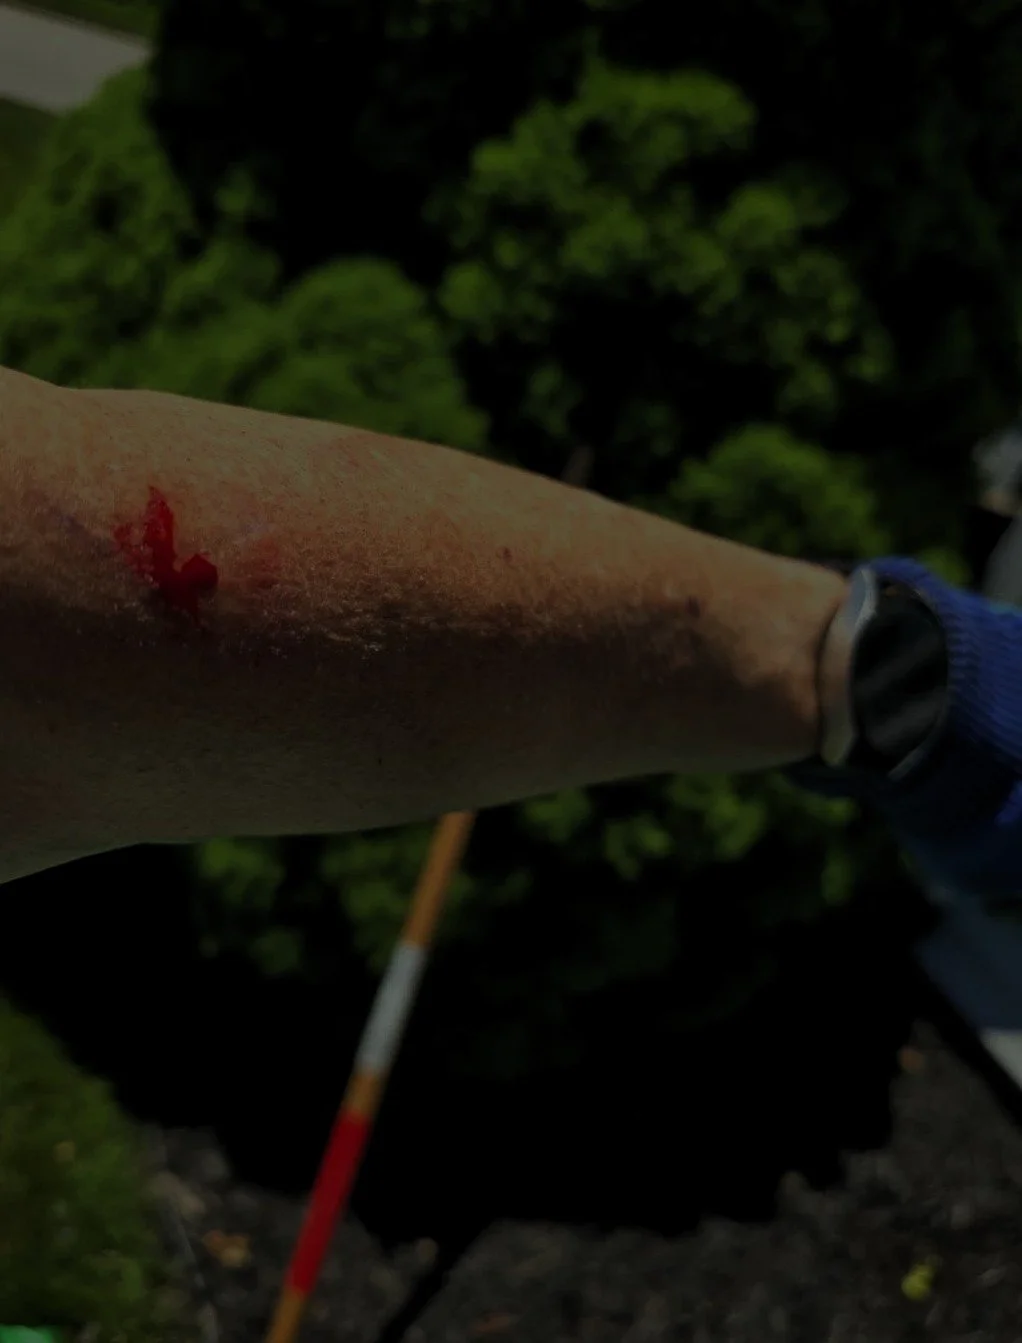
A Word About Rhoda
The larger of the two rhododendrons — I've started calling her Rhoda — caught me while I was working around her roots.
She drew blood.
Liquid bandage. Moved on. Rhoda and I have an understanding now.
Mulch Notes
One thing worth mentioning — when you're planting seedlings, keep the mulch 2-3 inches away from the base of each plant. Leave a little clear circle of soil around every stem. Mulch piled against young plants traps moisture and causes rot. Think of it like a donut — mulch forms the ring, bare soil in the middle. 🍩
For the sunflower seeds, don't mulch over the sow area at all right now. Leave the soil bare so they can sprout and reach light. Once they're 3-4 inches tall you can carefully mulch around them.
What Comes Next
Right now the bed looks like potential. A freshly worked stretch of dark soil, a row of tiny hollyhock seedlings along the house, rhododendrons blooming their hearts out in deep pink, and somewhere in that front stretch — sunflower seeds just waiting to wake up.
By July? Tall hollyhocks filling in behind the rhodies, Autumn Beauty sunflowers blooming in all their warm reds, oranges and yellows up front. The whole bed layered and full and exactly what I imagined standing there this morning.
I'll be documenting the whole journey right here. Come back and watch this bed grow. 🌻
What's in your garden today? Tell me in the comments — I'd love to know what you're planting this May!
Bloom & Dwell is a garden-forward outdoor living blog by Regina, written from her York, Pennsylvania garden with one eye always on Alabama.