A Bubbling Bath for the Hummingbirds (Built from a Bowl, a Plate & a Funnel!)
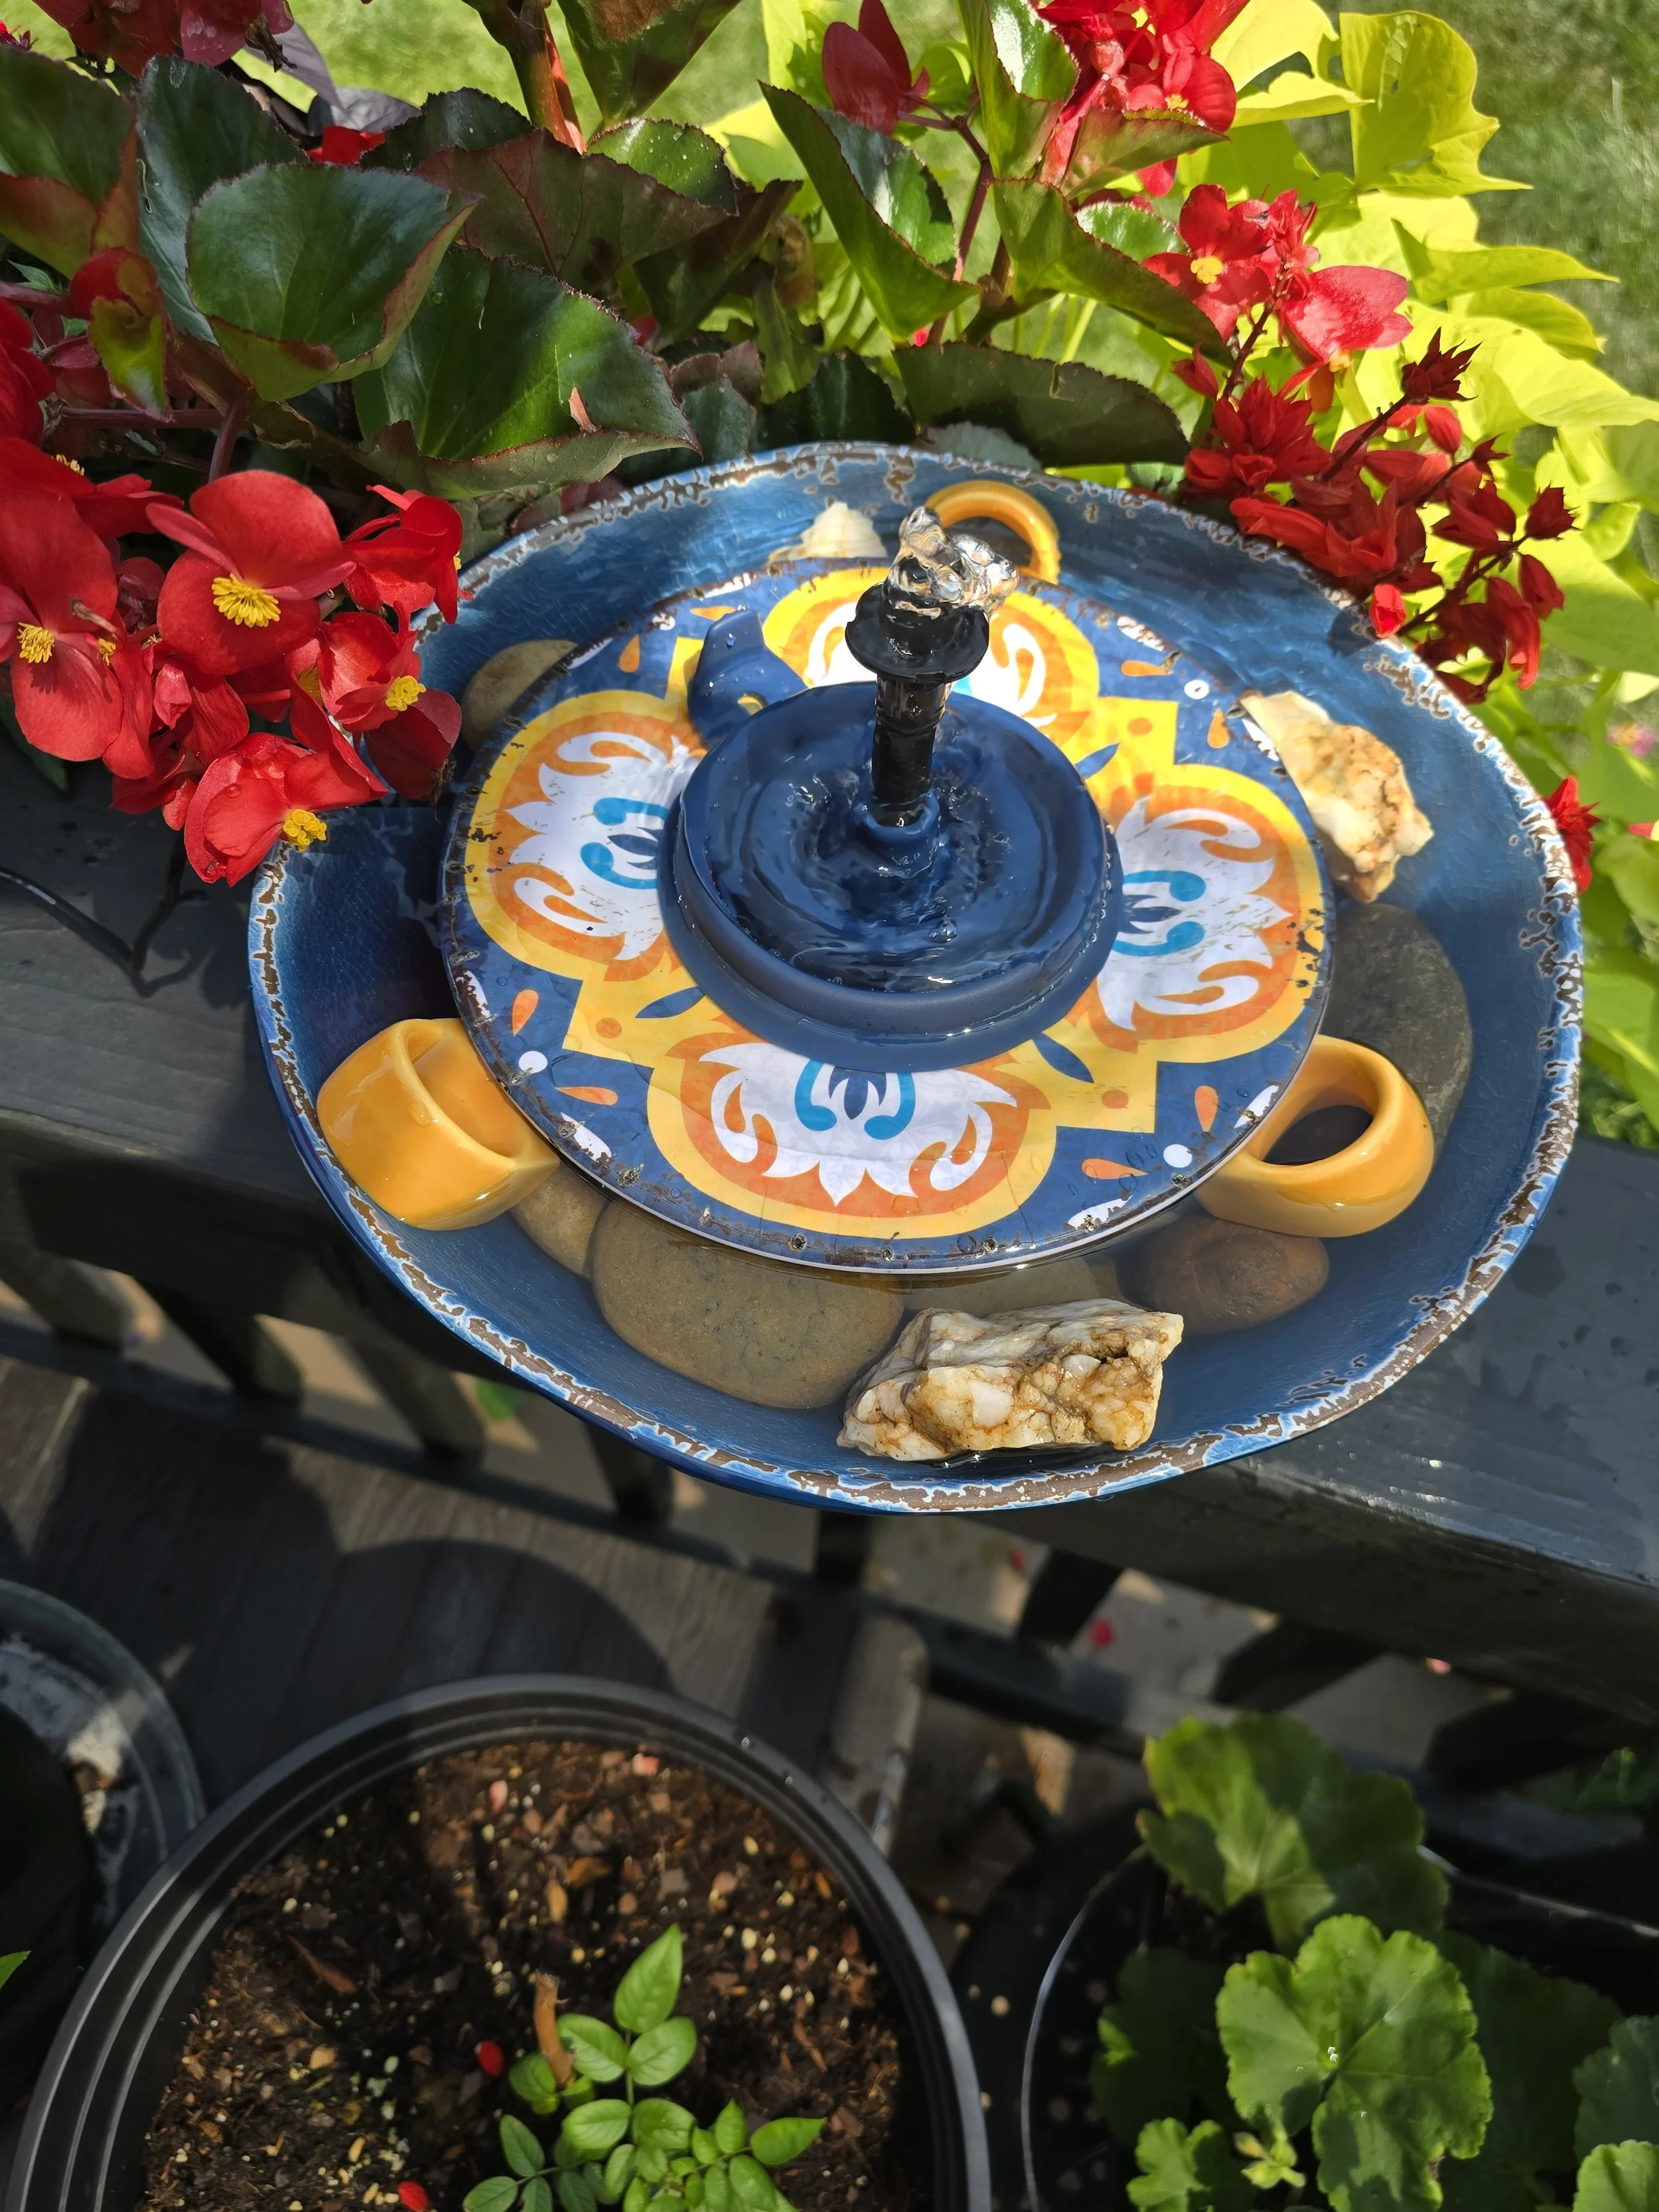
Navy, Mediterranean style hummingbird bath
Y'all know by now that if a hummingbird might enjoy it, I'm going to build it. With hummingbirds visiting the deck all summer, I decided our little visitors deserved a proper bath — something shallow, sparkly, and moving, because hummingbirds don't want a swimming pool. They want a splash.
So I raided the thrift store, the Dollar Tree, and my own supply shelf — and I'm tickled with how this turned out. Fair warning: there's a tiny bit of "power tool" work in it, but it's a soldering iron, not a saw, and I promise it's easy.
WHY MOVING WATER MATTERS
Hummingbirds rarely use a traditional deep birdbath. They're drawn to the flash and sound of moving water — they'll flutter through a fine spray or sip at the edge of a shallow ripple. A little solar pump turns a stack of pretty dishes into exactly the kind of water feature they love, with no cords to the house and no electricity bill.
WHAT YOU'LL NEED
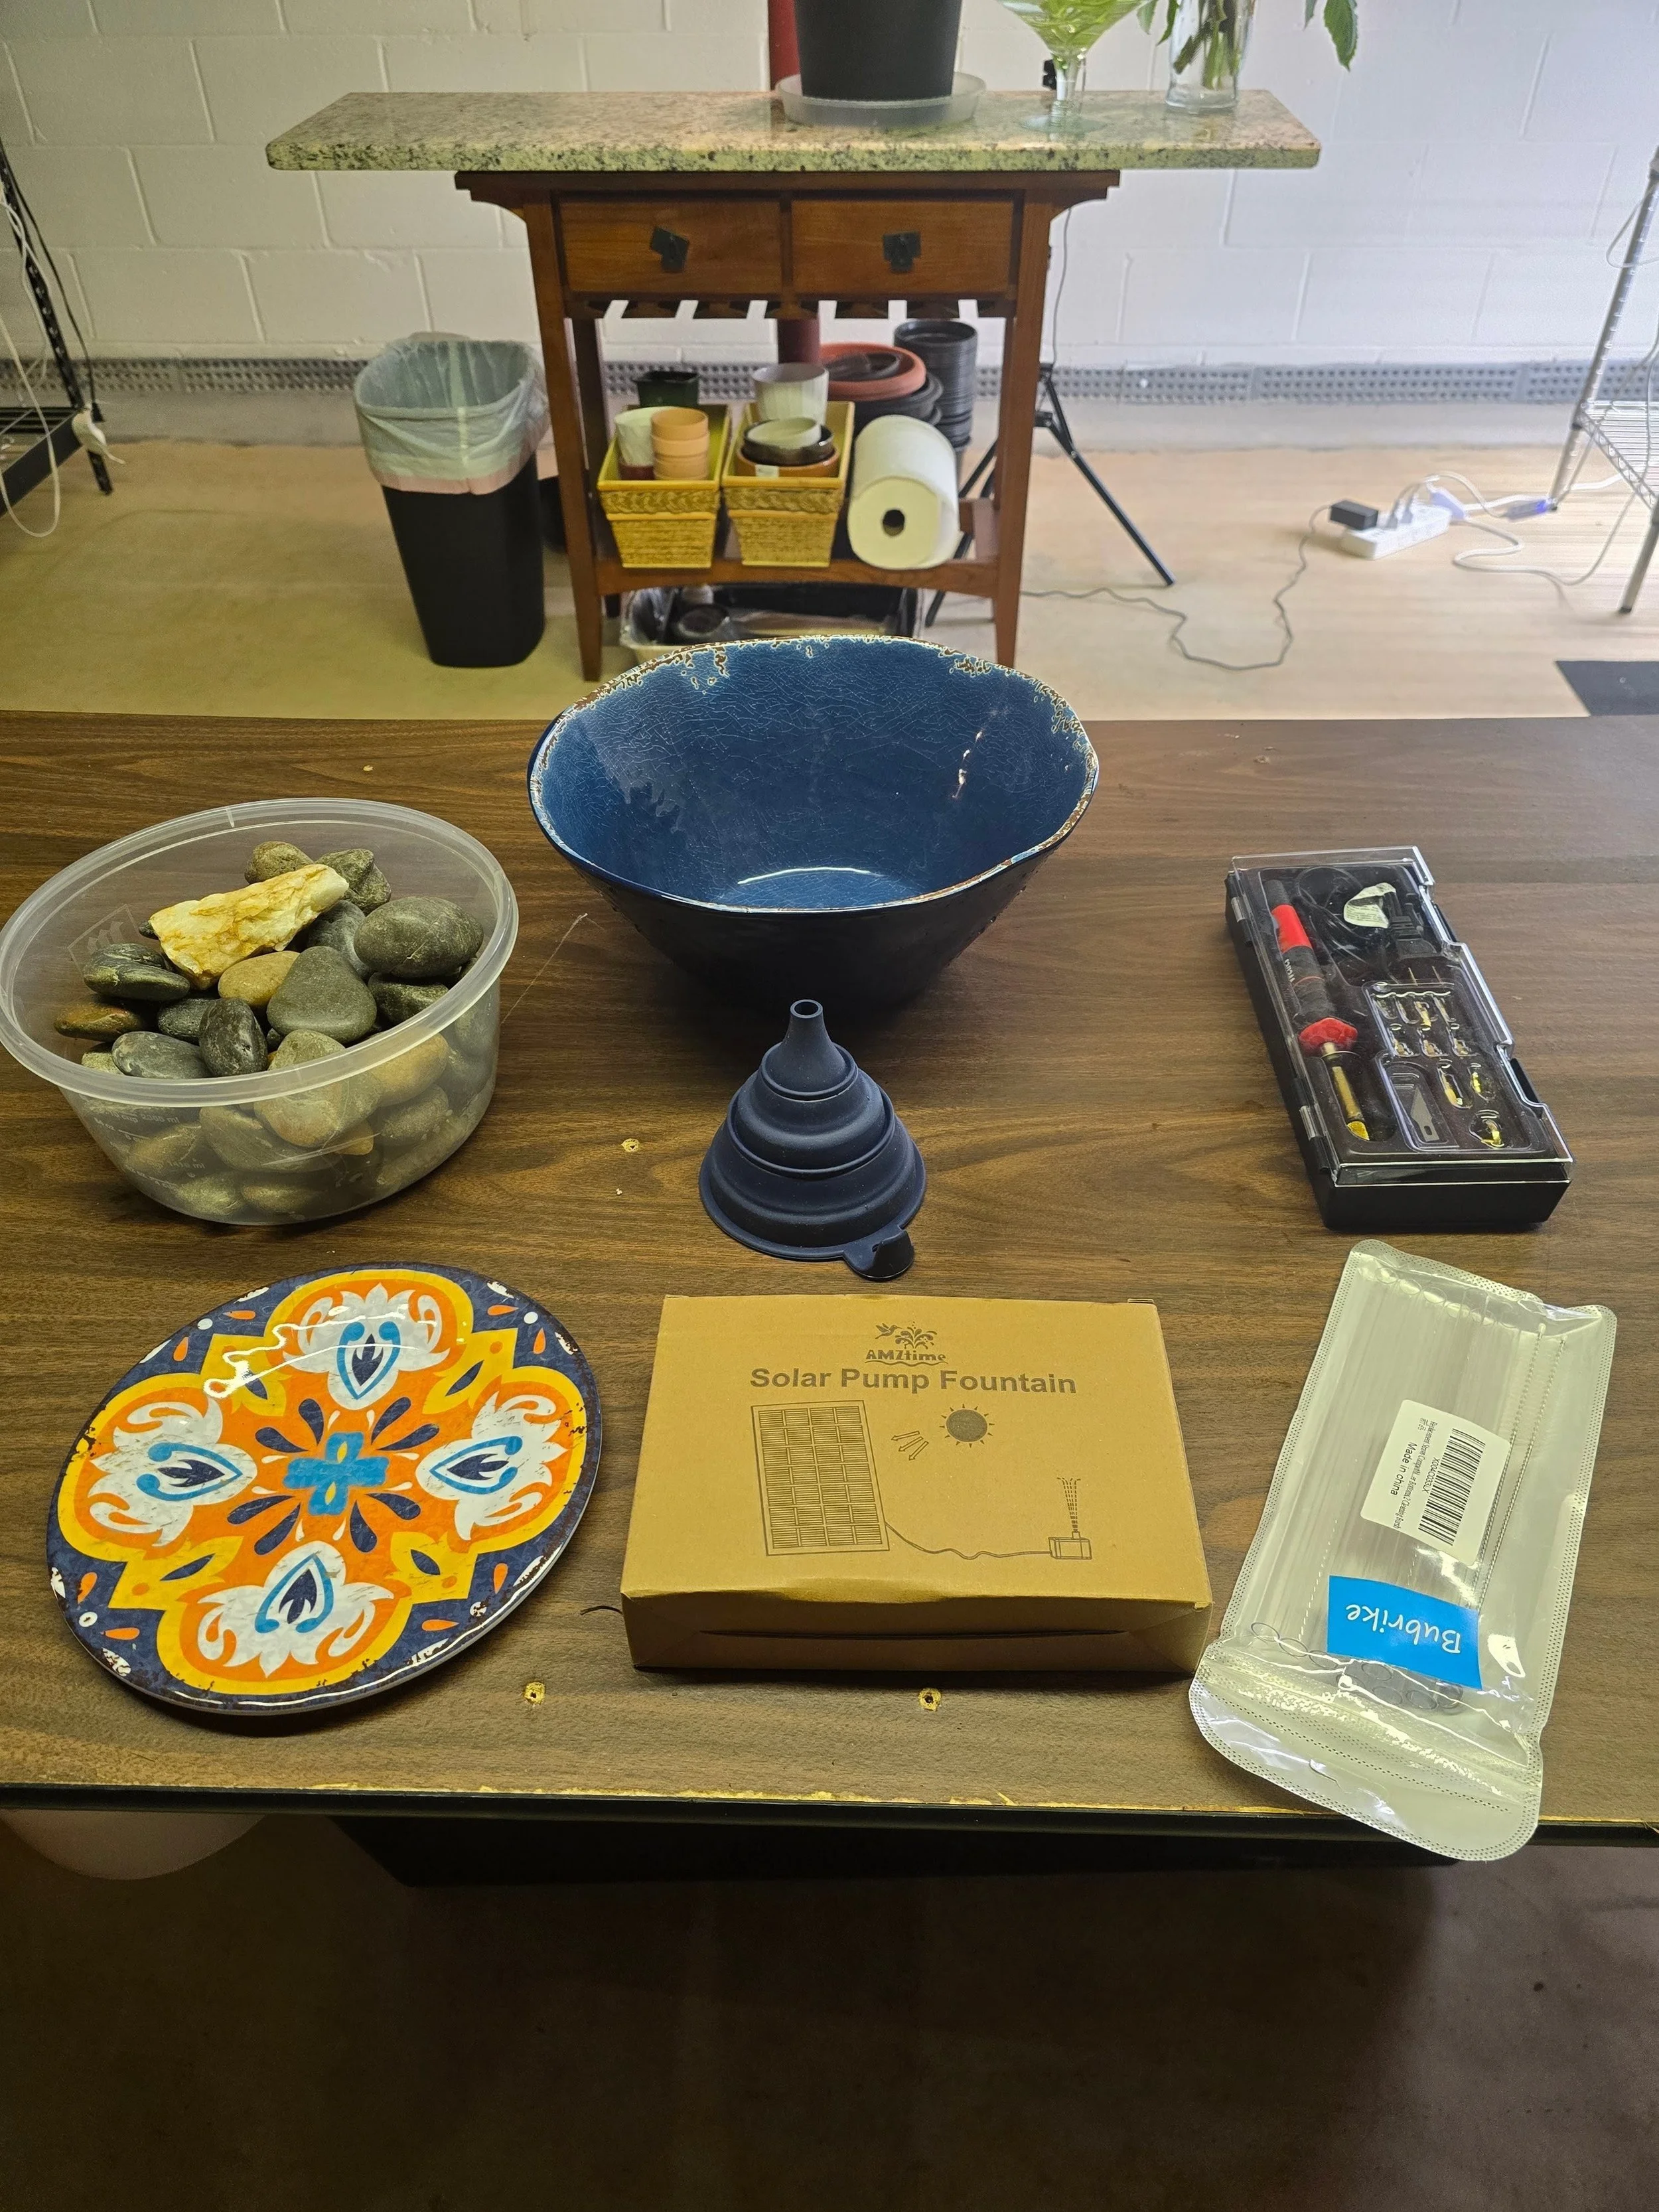
- 1 large bowl for the base and reservoir (mine is a deep blue melamine bowl with a rustic painted edge — thrifted for $2.49)
- 1 patterned melamine lunch plate, smaller than the bowl's opening (mine is a blue-and-gold Mediterranean print- $0 .99 at Ollies — the star of the show)
- 1 collapsible silicone funnel (mine is navy, so it disappears right into the design)
- 1 solar pump fountain with a clear riser tube (mine is the AMZtime Solar Pump Fountain, $9.95 on Amazon — it has a separate solar panel on a long cord, and I'll tell you below why that matters)
- 1 pack of Dollar Tree clear straws - $1.00
- A bin of smooth river rocks, plus a pretty chunk of quartz or two (bagged river rocks run under $10 at Lowe's, Home Depot, or Michaels — just be sure to wash them with soap and rinse well before they go anywhere near bird water)
- A soldering iron (mine is a Weller) for melting holes in the plastic
- Water!
A few fun extras: I tucked in three yellow ceramic napkin rings from Pier 1 — bought years ago, one of the set broke, and the survivors had been sitting in a drawer ever since. Now they're little perching accents in the water. Shop your own drawers, friends.
Budget note: with a thrifted bowl, a 99-cent saucer, and a $10 pump, the whole project lands around $15 — and yours won't look like anybody else's.
HOW TO PUT IT TOGETHER
1. Make the plate your fountain deck. Flip the plate over and use the soldering iron to melt a hole in the center, just big enough for the pump's clear riser tube to pass through. Work outside or by an open window (melted melamine has a smell), and go slow — the iron does the work.
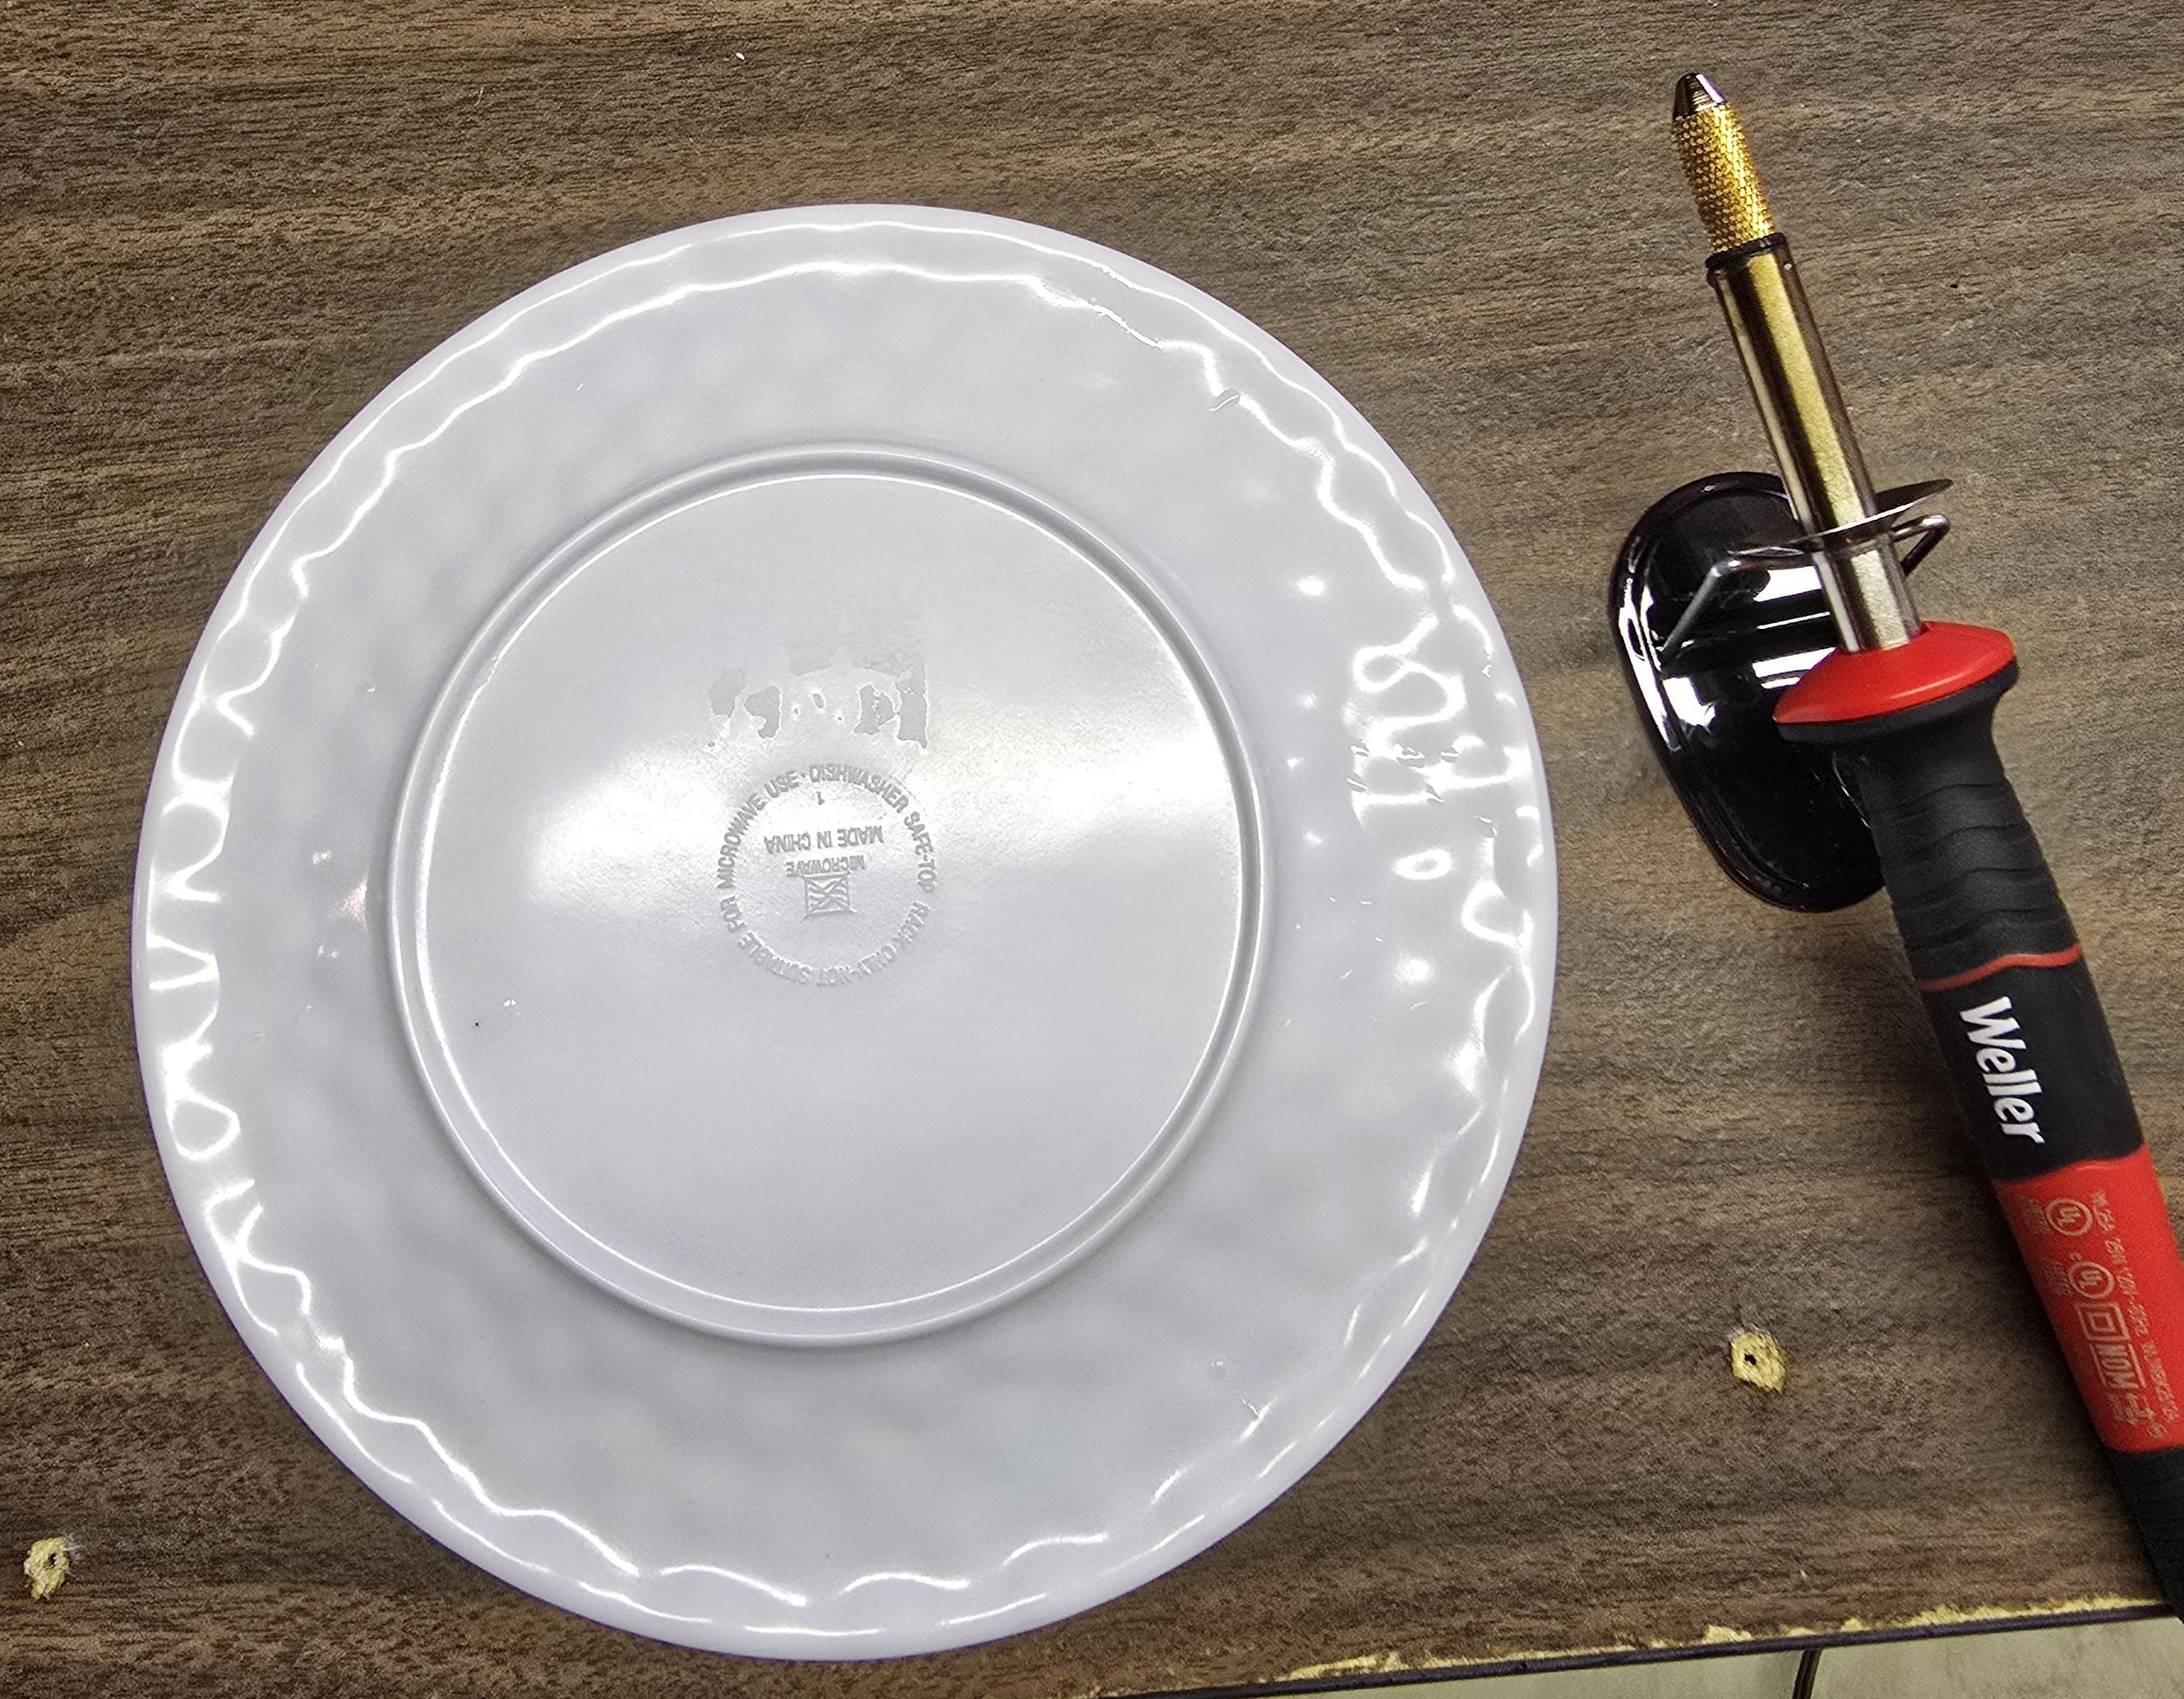
Solder in the very middle of the plate. Let the iron burn through, then turn it over and do it from the front of the plate so no burn marks show.
2. Rough up the plate's rim with the soldering iron tip while you're at it. A few passes along the edges takes away that slick factory finish and gives tiny bird feet something to grip. This little step matters more than you'd think.
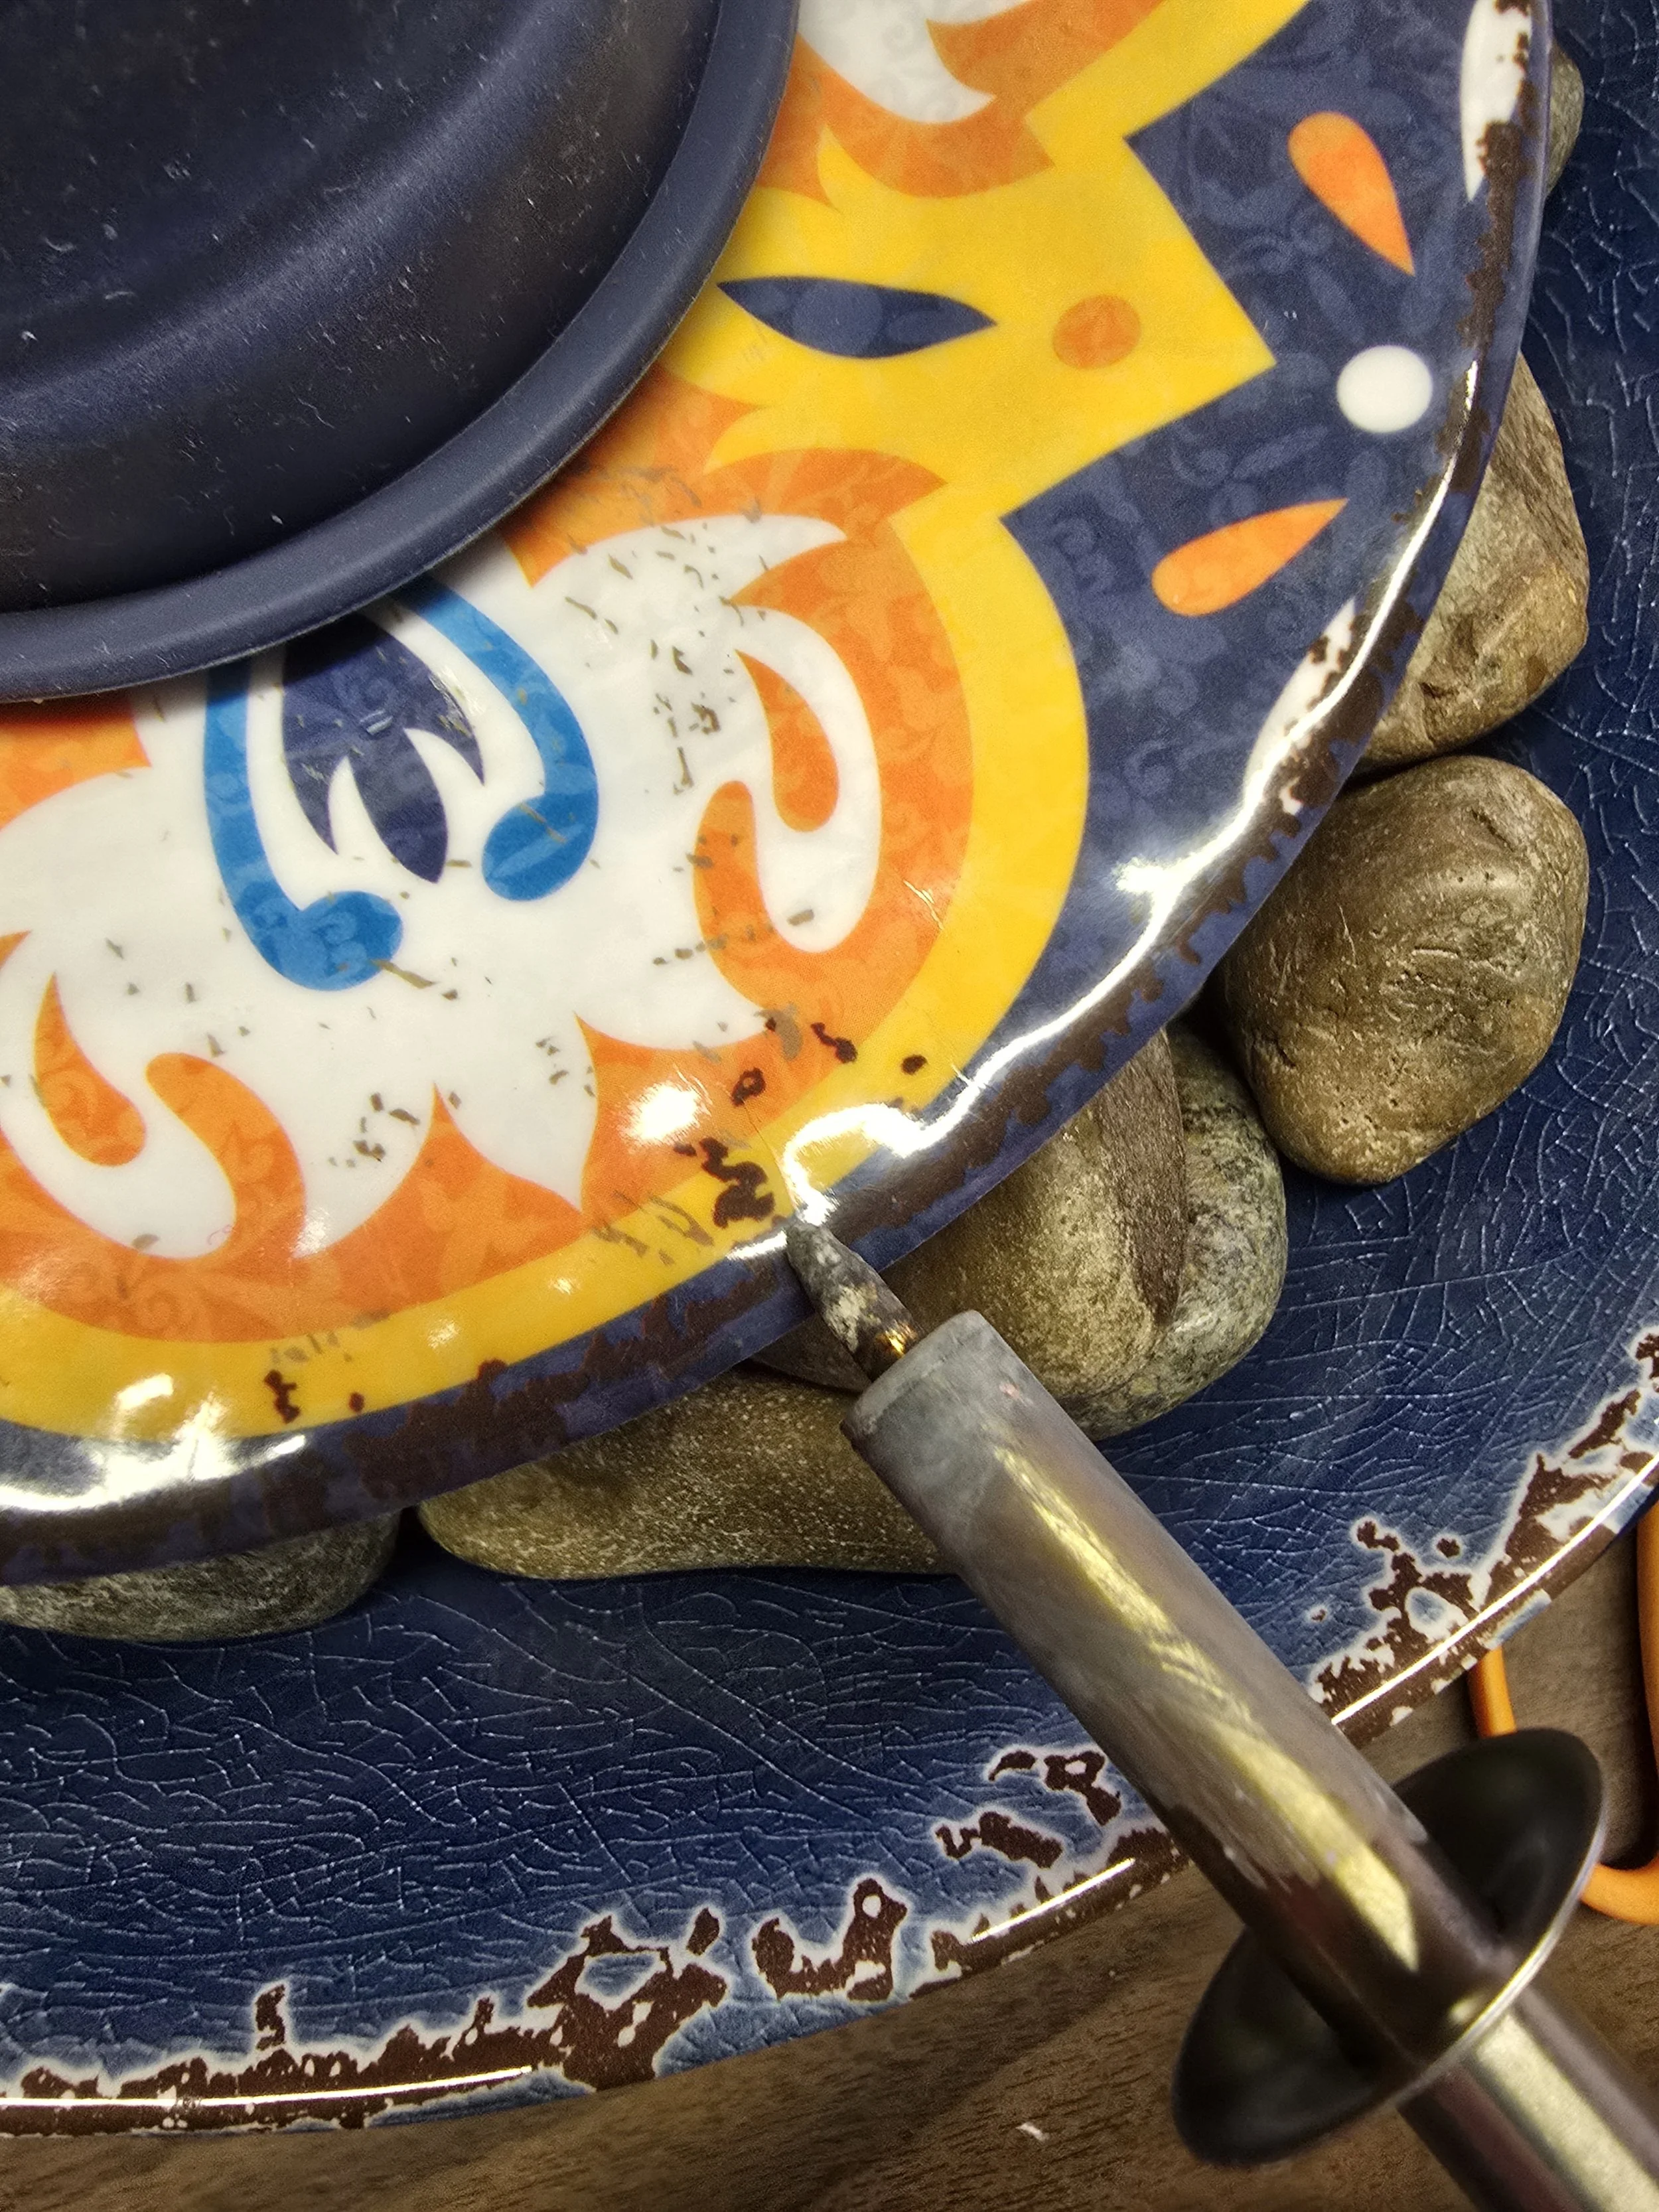
Just roll the iron in each spot to leave a slight indentation.
3. Set the pump in the bottom of the bowl, run its cord over the rim, and attach the clear straw over the pump water outlet. Make sure to set the suction cups on the pump to the bottom of the bowl so that the straw will be in the exact middle of the bowl.
4. Fill the bowl with washed river rocks around the pump. The rocks are your foundation — nestle and adjust them until the plate will sit LEVEL on top. Take your time here; a level plate means the water sheets off evenly all the way around instead of dumping off one side.
5. Build the pretty tower: set the saucer over the tube in the center of the plate, then collapse the silicone funnel flat and set it on top of the saucer, attach the pump bubbler nozzle poke up through the funnel's center hole. That stack of navy rings is what gives the water its tiered cascade.
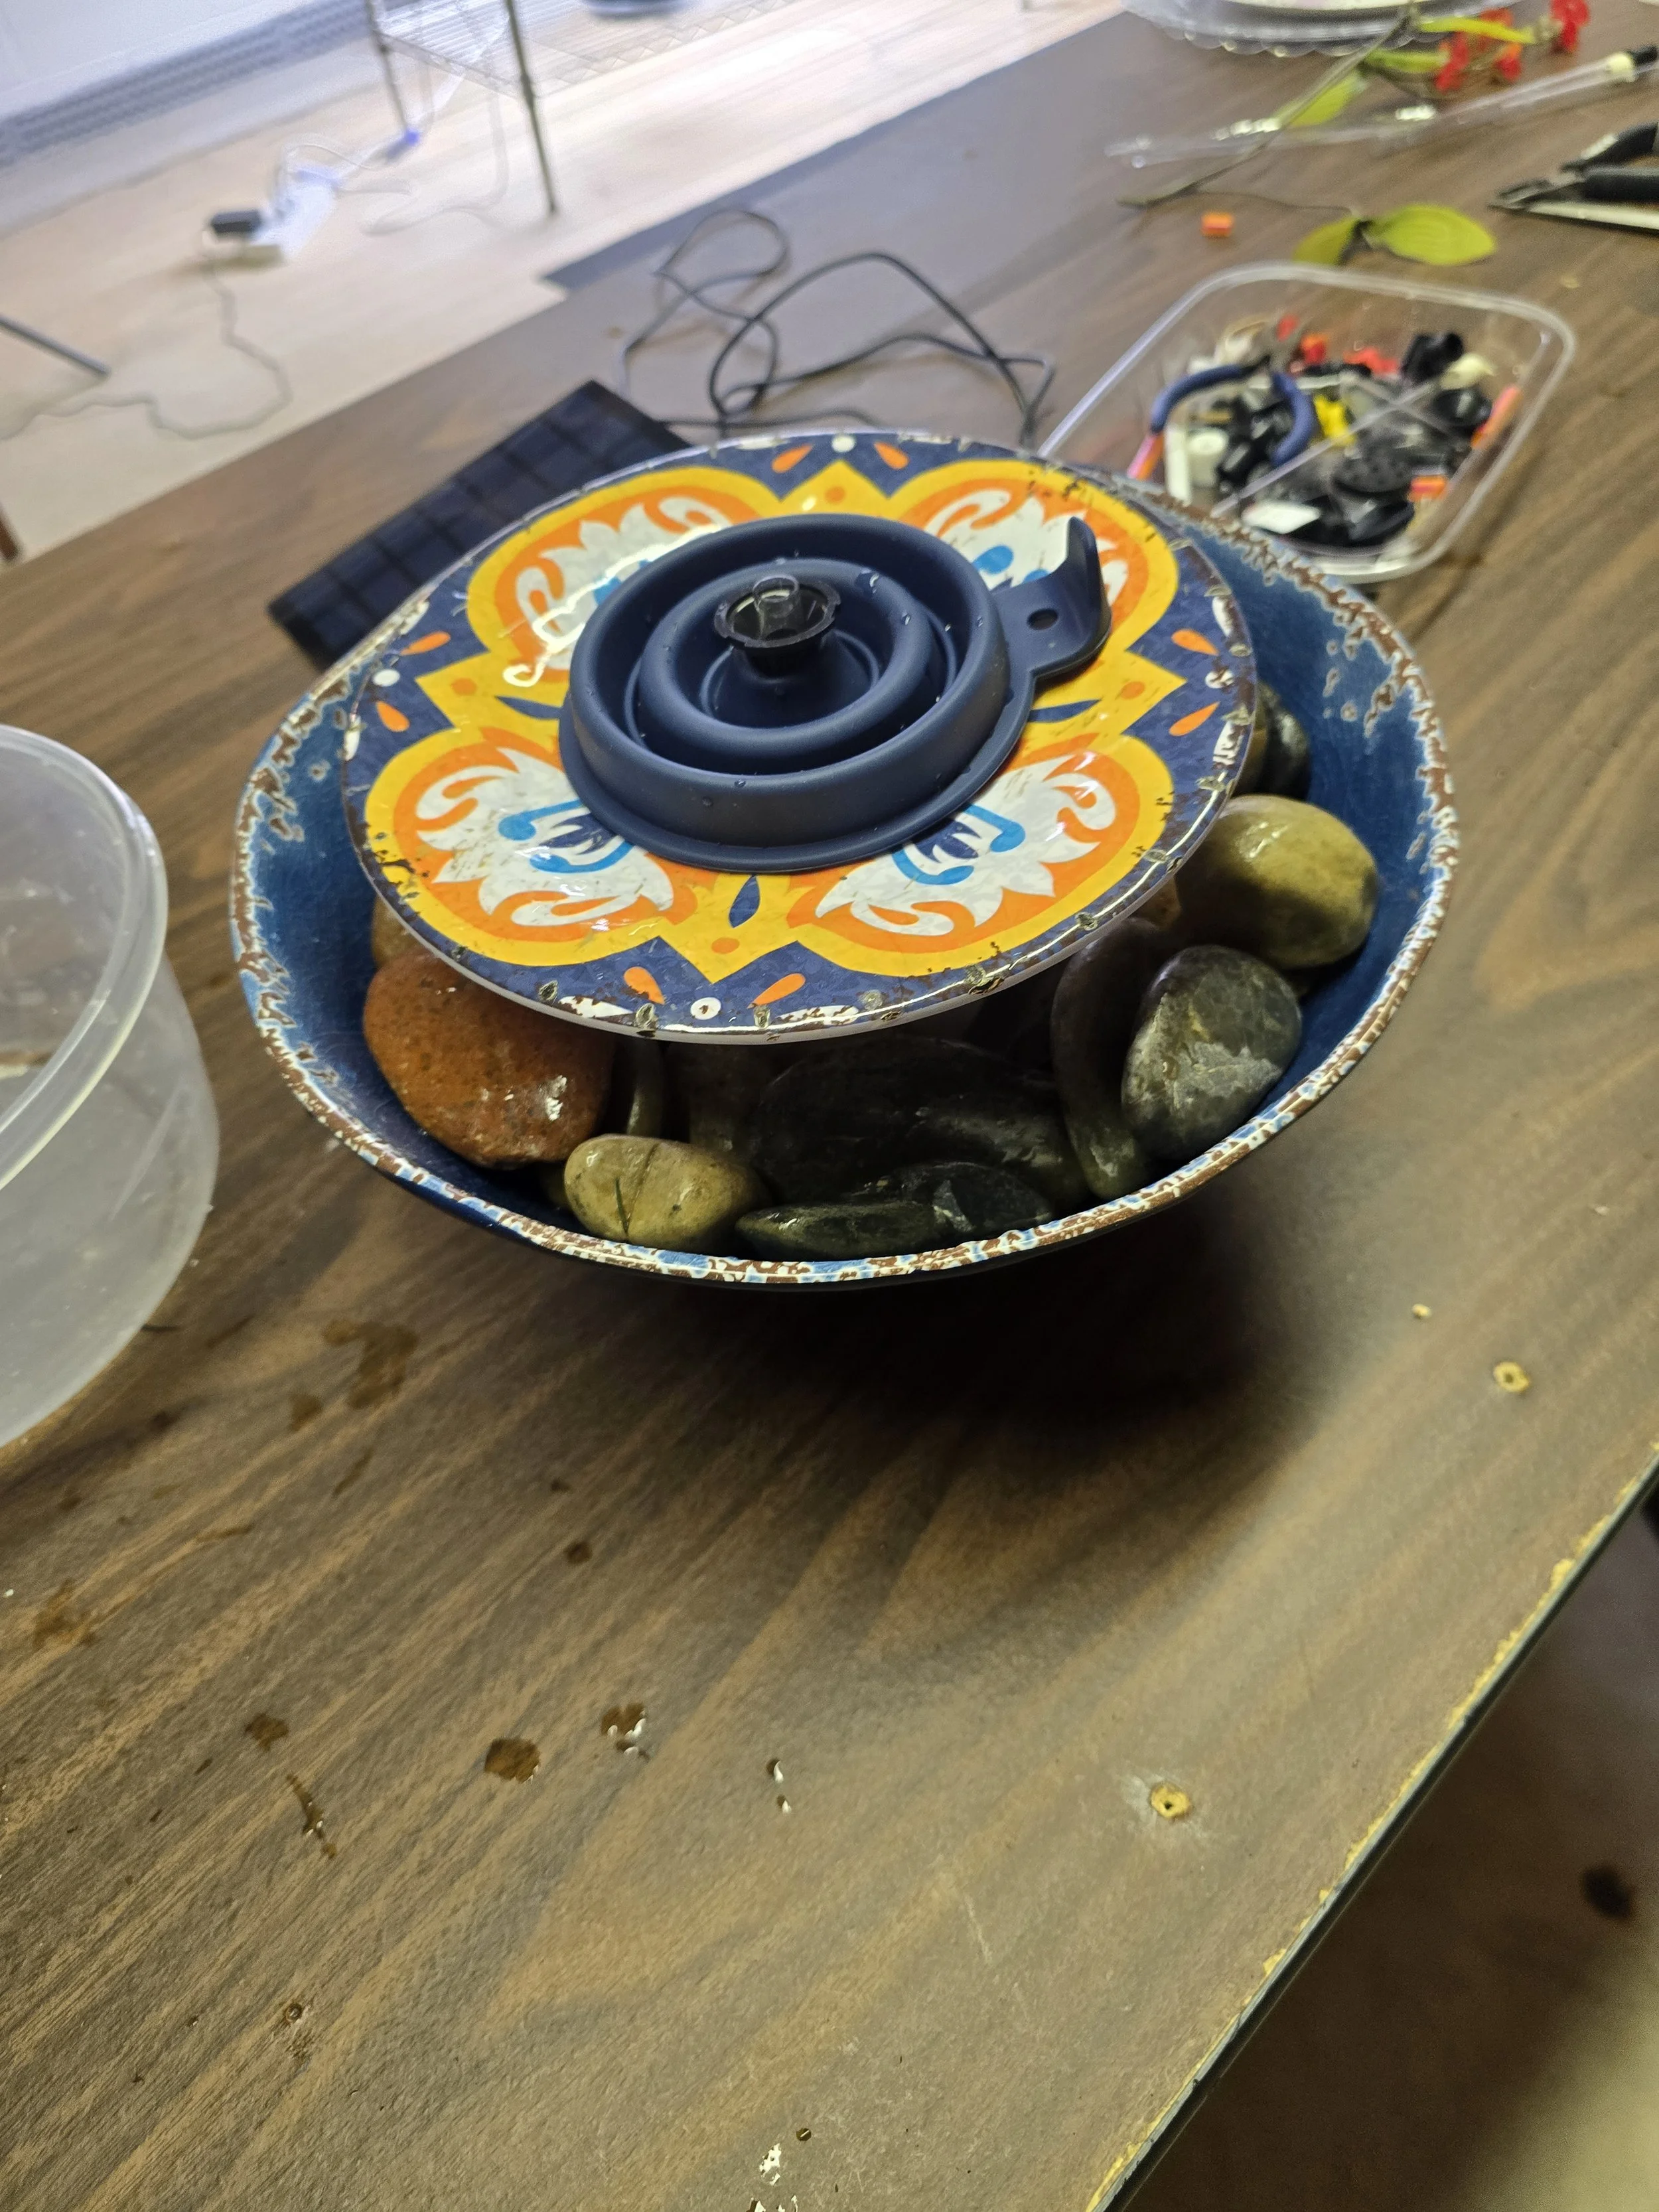
Completed! Ready to take outside and add water.
6. Run the solar panel's cord out to wherever the sun hits best. This is the beauty of a pump with a separate panel: the fountain can sit where YOU want it — even tucked among the flowers — as long as the panel reaches full sun.
7. Fill everything with water and let the sun do the rest. The water burbles up through the tube, cascades down the funnel's rings, sheets across the plate, and rains off the roughed-up edge into the rock-filled bowl below. It's a tiny waterfall, and the sound is heavenly.
8. Finish with your accents — a chunk of quartz, the napkin rings, whatever makes it yours.
TIPS FROM MY DECK
- Level is everything. If water only spills off one side, lift the plate and adjust your rocks.
- Keep the landing spots shallow — that's what the rocks and rough edges are for.
- Wash store-bought rocks with soap and rinse them well before using — they arrive dusty, and sometimes coated. Your rocks don’t have to be pretty. You can use gravel or rocks from your yard — but they do have to be clean.
- Top it off daily in summer heat. Between sun and birds, it goes fast.
- Rinse and refresh every couple of days so it stays clean and mosquito-free.
- If wasps discover it, a little peppermint oil rubbed under the rim sends them packing without bothering the birds.
- No sun, no show — solar pumps rest on cloudy days. The birds will still visit the still water.
MAKE IT YOURS: THE $13 WATERMELON VERSION
Here's the fun part — there's no wrong way to do this. My second one is the simpler version, and almost everything came from the Dollar Tre
- Watermelon-print plate: $1.50 at Dollar Tree
- Plastic watermelon jar : $1.50 at Dollar Tree
- A bowl I already had underneath for the reservoir, plus the same kind of solar pump
The plate also sits on rocks, but it covers most of the bowl and therefore needed drain holes to keep from running over. The soldering iron came back out for this one too, but the work is even easier: melt a hole in the bottom of the jar for the straw the came with the jar to connect to the clear hose and connect to the pump. The red straw shows in the jar. Melt little drain holes in the plate so the water circulates back down to the reservoir. And here's my favorite part — I put the drain holes right where the watermelon seeds are printed. The water drains through the "seeds." I tickled myself with that one!
Set the jar in the middle of the tray, the pump has the suction cups holding it to the bowl, and the water burbles out the top and ripples across those watermelon slices before slipping away through the seeds. Three dollars in Dollar Tree finds, and apparently I have a watermelon theme going on the deck this summer. (More on that in a future post!)
So look through your own cabinets first — you might have trays, bowls, funnels, or lonely napkin rings just waiting for a second act — then hit the thrift store shelves and the Dollar Tree seasonal aisle. You need one big base, something pretty for the water to travel down or bubble out of, and a little solar pump. Let your personality do the rest.
My hubby has already claimed the chair with the best view. Between the salvia, the feeders, and now the baths, those little birds are living better than we are — and that's just how we like it.
If you make one, I would truly love to see it. Share it with me in the comments. I’m here to answer any questions you may have - just comment below. Have fun - Make it yours!
--
Bloom & Dwell is a garden-forward outdoor living blog by Regina, written from her York, Pennsylvania garden with one eye always on Alabama.